The password manager to cure lockdown woes
Published on
Table of Contents
Introduction
I’ll be introducing a roughly two week project that I worked on with two other group mates for a uni subject. The theme we were given was to build something that makes our home smarter or more fun. As a team, we started off with the idea of a password manager and decided to add some small fun elements, that would make this password manager the most fun password manager out there (hopefully). This page will talk about the technical side of the password manager system itself in more detail than the video, as well as a bit about editing (with a tiny bit of animating) a video.
Link to Github repo
The Manager
The prompt itself was very open ended, however we needed to use the Arduino (and some accompanying sensors) to create something fun. In the end, we came up with a password manager that uses Python, which interfaces with the Arduino for some extra functions.
Python
Despite my questionable coding habits, I was in charge of the entire Python side of the system, due to me being the one with the most experience with it.
Initially I had planned on letting all the user interaction happen via an LCD display connected to the Arduino, and let the Python side of things be controlled through terminal only. However, I was inspired by a workshop/project from the same uni subject where I built a simple GUI in MATLAB.
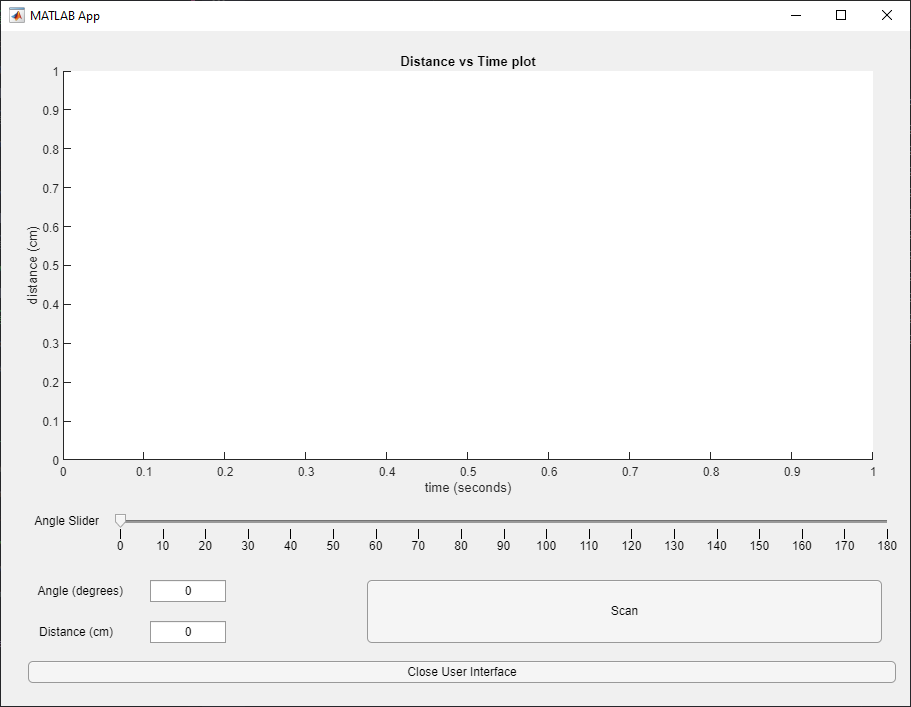
What this MATLAB app did was control the angle of a servo, on which there was a range finder which sent distance readings to be plotted on MATLAB. This was all made entirely possible thanks to a serial connection between MATLAB and Arduino (where the servo and range finder were connected).
As fun of a challenge using MATLAB for this system would be, I think I’ve had enough MATLAB for one year. So using the serial connection idea, it was possible to let the Python code communicate with Arduino with pySerial , a python module. In terms of designing and making a GUI, there are plenty of libraries to choose from (such as tkinter , wxPython and PyQT just to name a few). I ended up choosing PySimpleGUI mainly because I was promised an easy and quick way to code up a GUI.
GUI
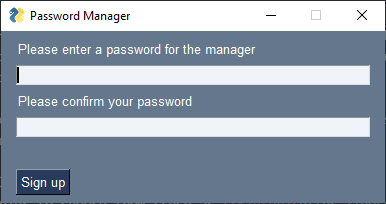
Since the Arduino has no way to store passwords (that I’m aware of), all the passwords will have to be stored onto the computer that’s running the Python code. To do that, it will read and write all the details onto a text file, saved in the same directory as the Python code. If a non-empty password file doesn’t exist in the same directory, it will bring the user to a sign up screen, where they’ll be prompted to create a master password.
If a non-empty password file already exists, or the user has finished setting a master password, they’ll be taken to a login page (I was clearly too lazy to fix up the login message).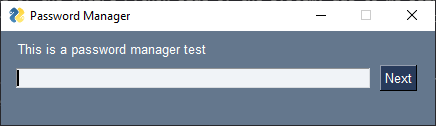 Once successfully logged in, the user will be brought to the home page, where all their accounts and passwords are stored.
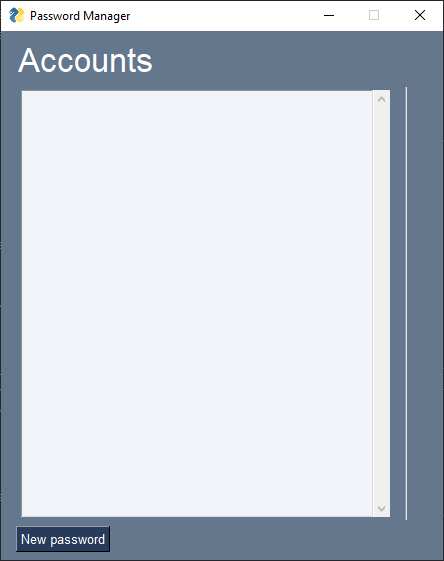
By clicking “New password”, the user will be introduced to an additional screen where they are able to add a new account password combination. The user is able to enter a password of their own choosing, or use the generate password button to automatically generate one for them. Even after generating a random password, the password can still be edited.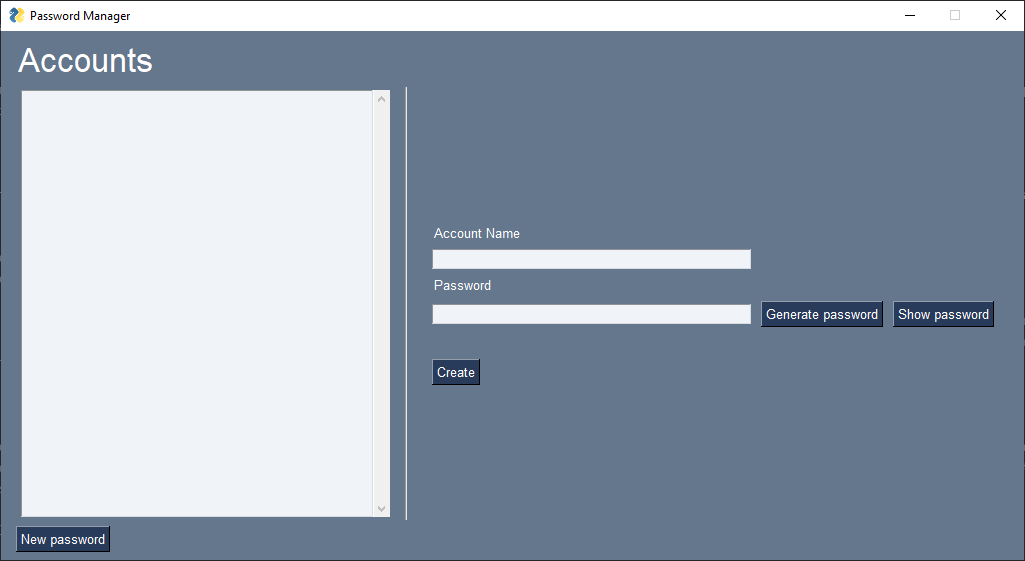
The user is also able to see passwords of all their accounts, copy a password to their clipboard, or delete an entry.
The Random Password Generator
Now to reveal the magic behind the “Generate password” button. When the button is clicked, the Python code will request a number from the Arduino (more details on how that number is generated later).
This number is fed into the urandom function from Python’s os module. What this outputs is a very random (technically not truly random, but that’s a topic for computer science to handle) sequence of bytes, whose size is determined by the number given by the Arduino.
The result is then fed into random.seed(), which will act as the seed to generate a large integer within a certain range.
The large integer that gets generated will get its digits split into groups of 2, where each group will represent one character of the password. Then, a book cipher-like decoding will occur, where the alphabet is all ascii letters (A-Z and a-z, from string module’s ascii_letters), all numerical digits (0-9, from string module’s digits), and select punctuation (!@#$%^&*). This choice is somewhat arbitrary. Since there needs to be 100 characters in the password alphabet (groups of two numbers range from 00-99), the numerical digits were repeated 3 additional times in order to pad the password alphabet. This choice was absolutely very arbitrary.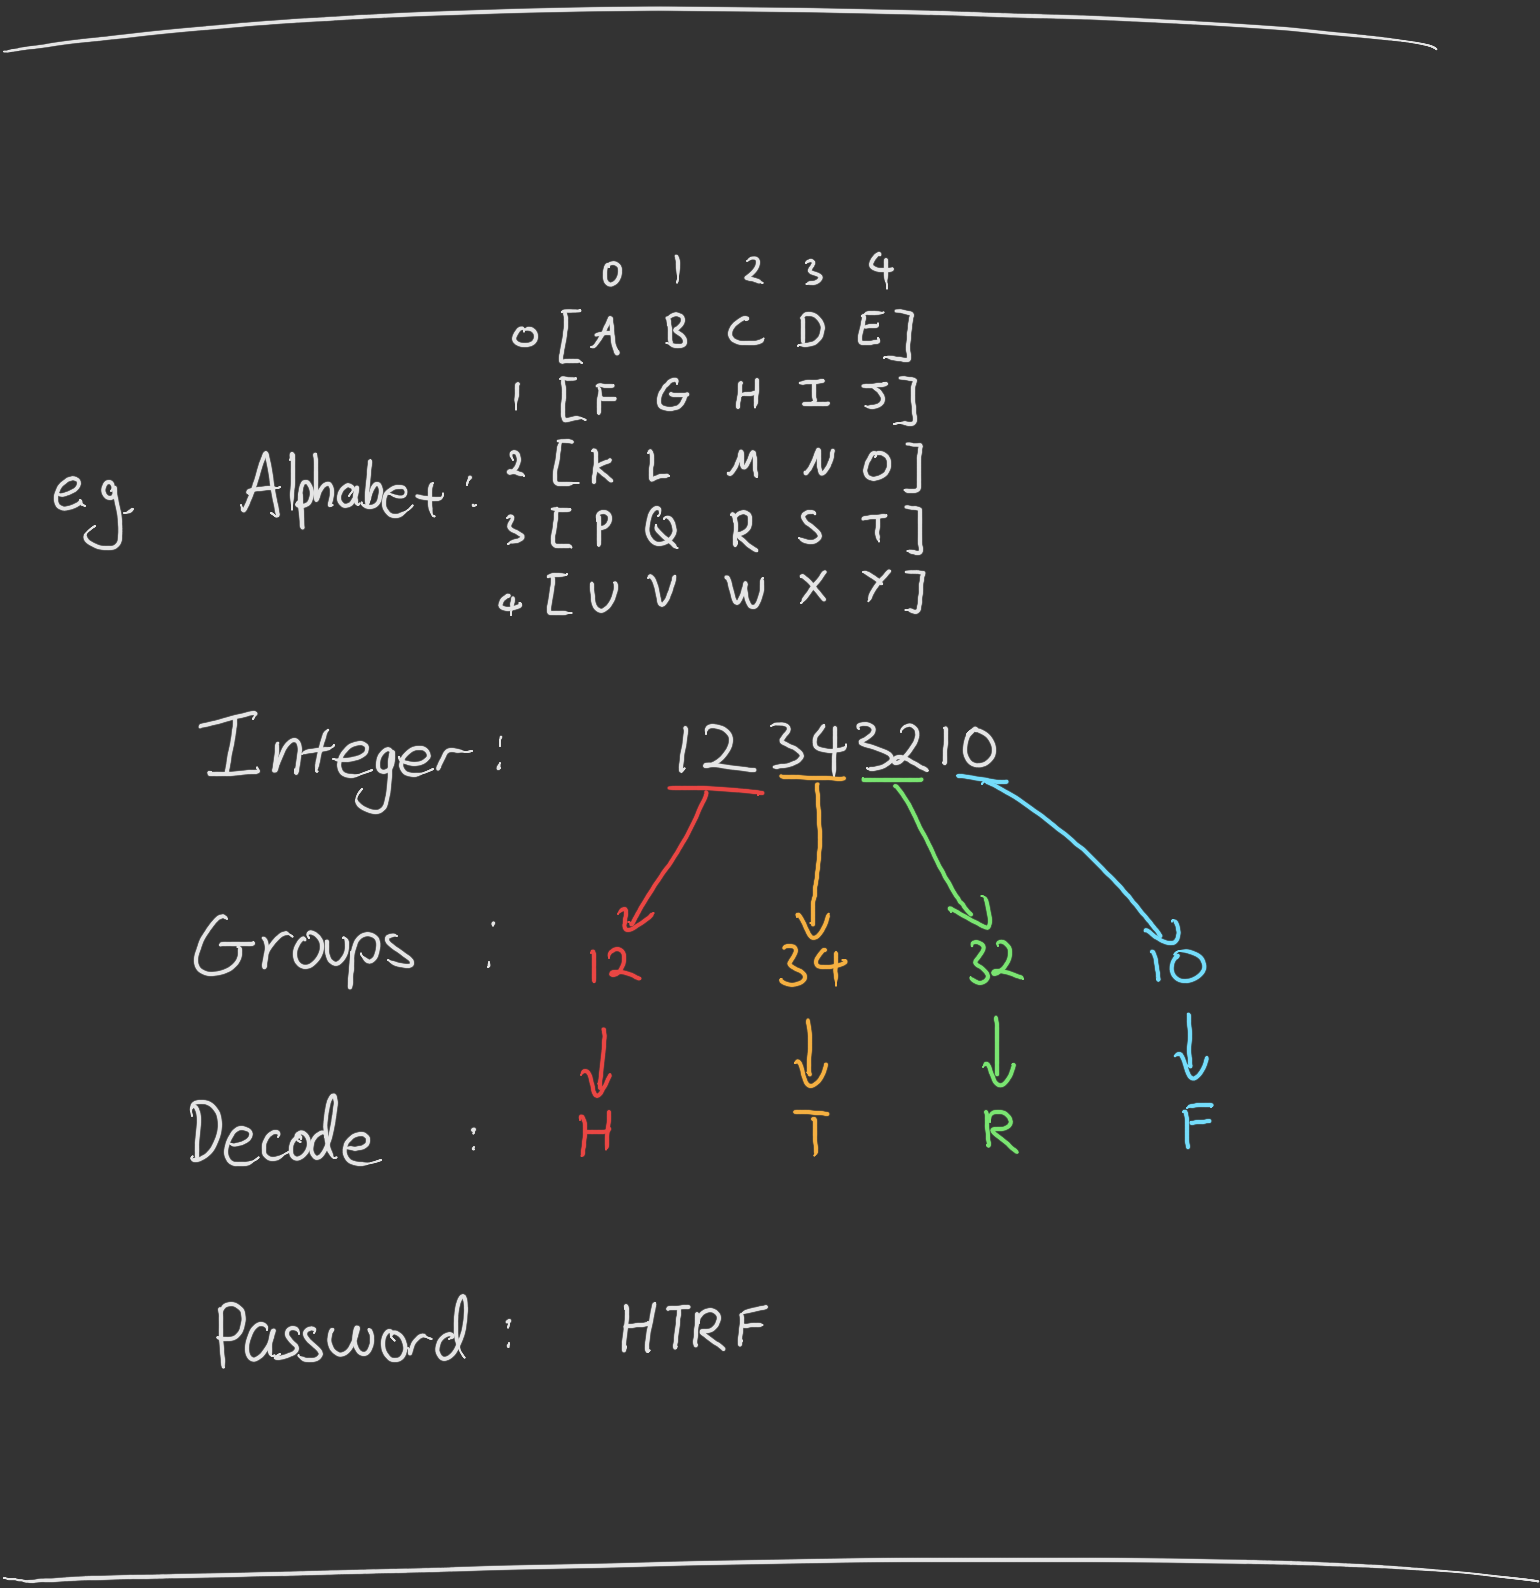
Storing Passwords
Just to add a tiny bit of security, the passwords themselves are not stored as plain text in a file, but rather as the encoding of it (using the password alphabet described above). All passwords (whether generated or entered manually by the user), are encoded when the “Create” button is clicked.
The master password on the other hand is stored differently. It is hashed using sha256 courtesy of the hashlib module, and every password entered into login is checked against this hash.
Arduino
The features on the Arduino were handled by my group mates, but here’s an explanation of what happens.
The Sensors
To generate a number that then becomes the seed to the random number generator in Python, there are two separate voltage divider circuits, involving a photoresistor and a thermistor. Both of these are special types of resistors, and their resistance changes according to the brightness and temperature of its surroundings respectively.
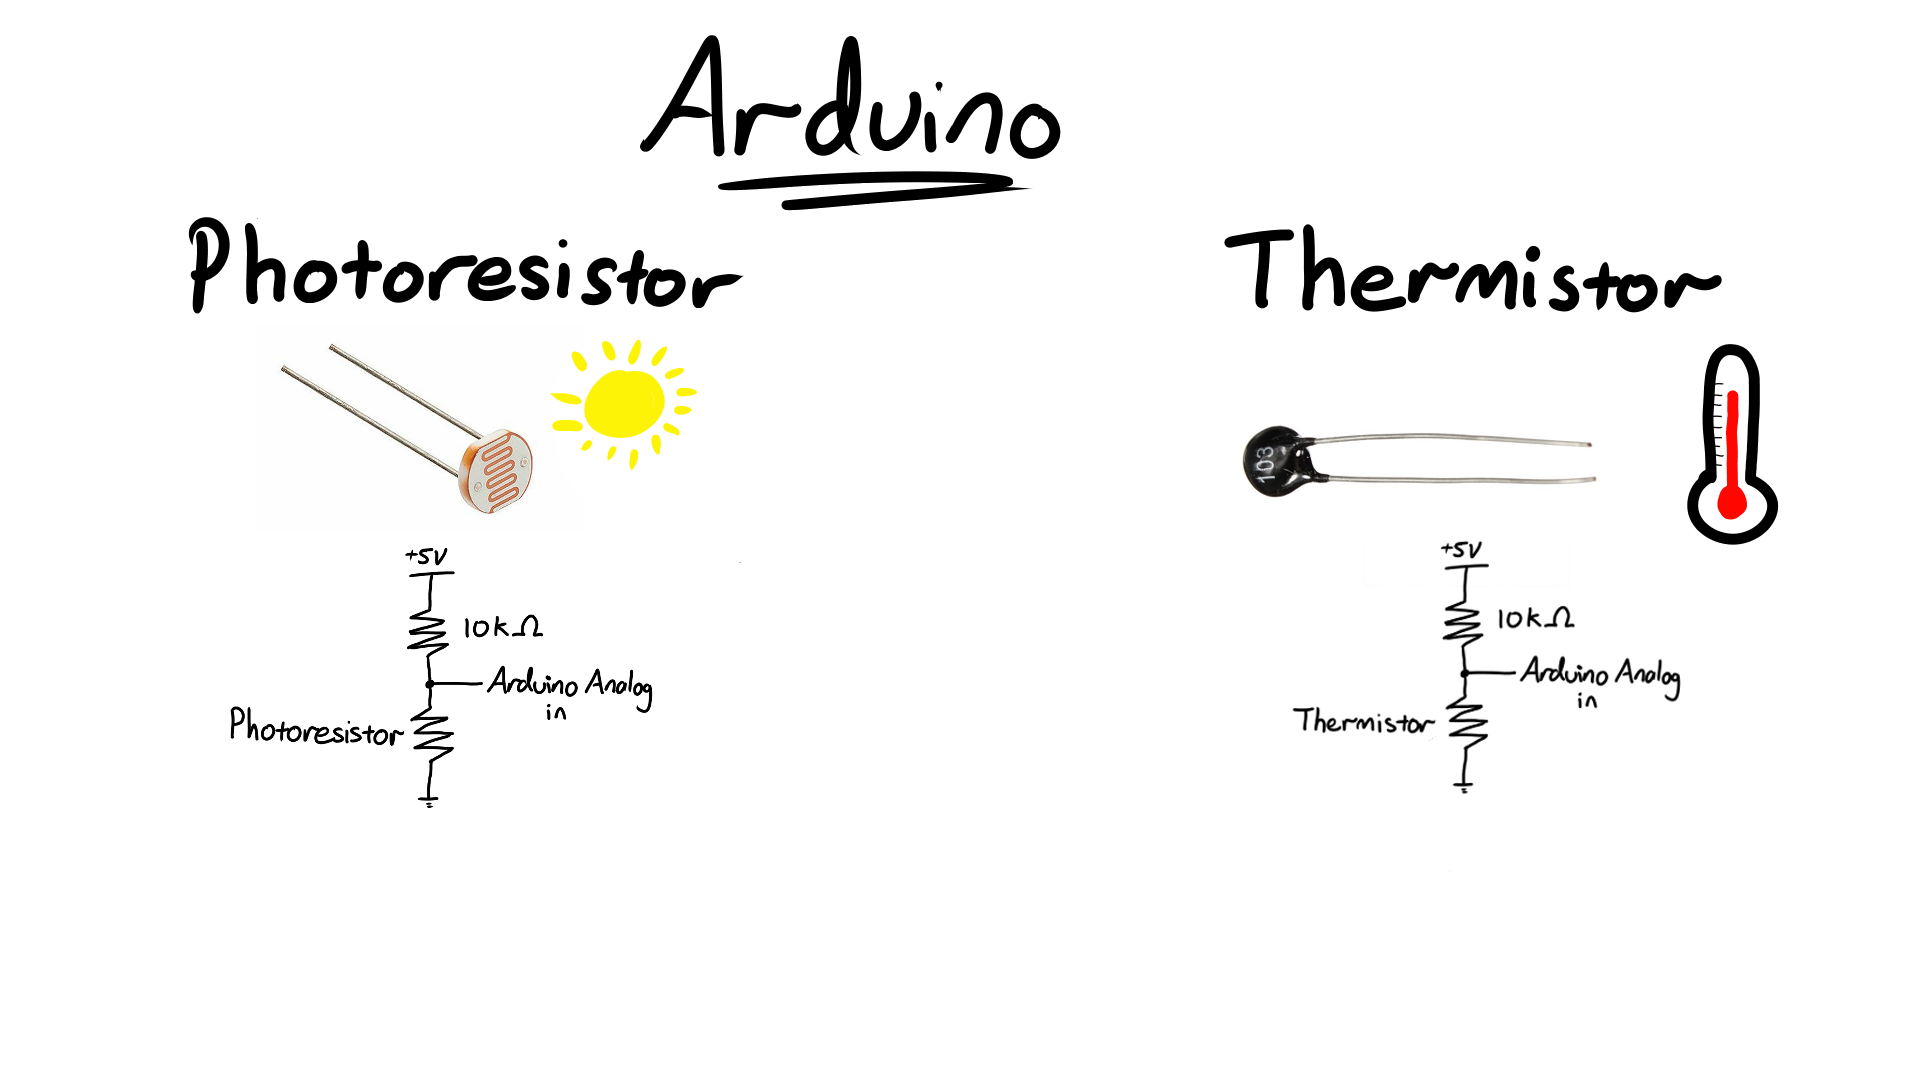
The Arduino measures the voltage across the photoresistor/thermistor, and returns a number between 0-1023, due to how the Arduino reads in the analog values
. These two numbers then get added together, and are sent through serial back to Python.
The LCD
There is an LCD that acts as part of a visual display of success/failure. When a password has successfully been created (i.e. when the create button is clicked on the GUI), the LCD will display “PW GEN Success”, along with the password that had been created. On failure, it will display “PW GEN FAIL”.
The RGB LED
To make this password manager system truly epic gamer friendly, there is a single RGB LED. When the password is successfully created, the RGB will randomly change colour every half a second. If password creation has failed, the RGB will stay red.
The Active Buzzer
The sweet tunes promised in the video comes from this buzzer. However, I was very misleading in the video, as Darude - Sandstorm is never played when the system is in use. Instead, on a successful creation of a password, a simple melody will be played. On the other hand, if the password create fails, an angry sounding tone will play instead.
The Servo
In order to control the candy monster shown in the video, there is a servo that opens/closes the mouth. Upon successful creation of the password, the mouth will open, and the user is free to grab whatever candy they like. The box will close when a request to generate a new password has been made.
Flaws and Possible Improvements
There are no doubts a ton of flaws with the system, and plenty of ways to improve the system. Here are some I’ve thought of:
- The Python code may contain a lot of bugs, as I spent a solid chunk of time discovering and patching some bugs.
- The Python logic could also be a lot simpler as well, for example, the delete function has to read, delete the contents of the file, then rewrite the entire password file. Whilst it works, its inefficiency hurts a little.
- Currently, the code can only generate passwords that are 8 characters long. It does this by forcing the
randintfunction to generate a number between1000000000000000and9999999999999999. This means that numbers less than1000000000000000cannot be generated, leaving a lot of potential passwords unable to be generated. It can also be extended to create a password of any (reasonable) length specified by the user.- Instead of this weird cipher way of generating the password, the
randintfunction could instead be callednnumber of times, where each call generates one character of the password, and when storing/retrieving the password, the encoding/decoding can be used instead.
- Instead of this weird cipher way of generating the password, the
- Both the Arduino and Python code could be cleaned up to look less like a giant messy chunk of code.
- At the moment, Python sends a
1to Arduino if it wants to request a random number. If for some insane reason, someone decides to have1as their password, the system will not behave as expected. - The password manager GUI could do with additional features, such as editing an existing password, or even changing the master password. Someone with more design talent than I could also make the user interface a lot better.
The Video
Now, within the two weeks we had to get this project done, my group mates and I also needed to make a video for the subject. Being the only one in the group who felt confident enough to edit videos, I was tasked with being the de facto editor and director for the group. This was a role I was definitely not prepared for one bit. I had previously used Adobe After Effects to do some video editing (and a ton of animating mouths moving), but that was 5 years ago, and using a high school license. After some experimenting with free, open source alternatives, I settled on Shotcut , due to its decent performance on my computer, and had most of the features that I wanted (that required lots of looking up tutorials for).
The Visuals
Thankfully, my group mates were able to provide visuals for parts of the video. The entire material and demonstration section just required some slicing and piecing pieces together, and the intro just needed additional editing touches. However, the real struggle lay in the parts in between: the dialogue, and my short technical explanation.
No one really had any idea what to put on top of these, hell, I didn’t even know how I wanted my explanation parts to look like. Eventually I settled with doing some really basic drawings and animations, for better or for worse.
All drawings were drawn using FireAlpaca
mostly because it was something I already had installed on my computer, and it sure beats MS paint. It also has onion skin view, which helps with animating. I initially wanted to use OpenToonz
or Pencil2D
for a better time doing lip syncing animations, but both these applications seemed to hate my drawing tablet. Hence, I resorted to drawing each frame in FireAlpaca, and manually stitching them together with Shotcut.
Visual Inspiration and References
Lip syncing: The video that got me into drawing mouths that move
The arm-less stick figures: My drawing talent (arms are overrated anyway)
The better looking stick figures: 1
, 2
, 3
The Audio
The audio was the part that received the least attention, as it mainly involved dragging and dropping the audio files into the editor, with minor changes to volume, and perhaps the occasional fade in/out. Music was pulled from copyright free music sites (except for Sandstorm).
The Struggles
My computer is in no way designed to edit videos, and editing a video with several hundreds of files (mostly due to lip syncing images) using Shotcut definitely slowed down the entire editing process down.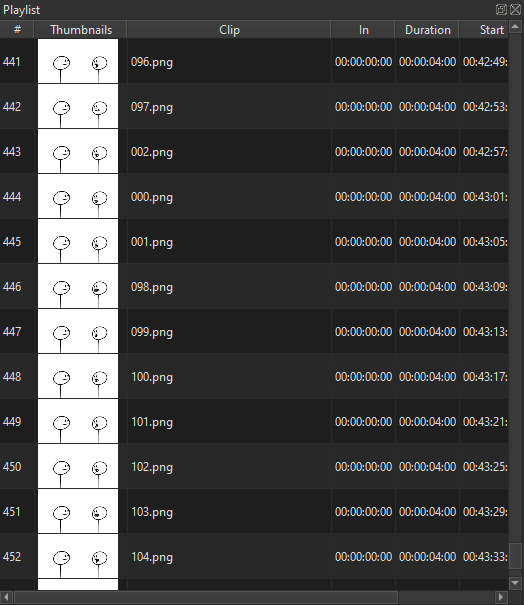 Although my memory usage hovered around 80-90%, and CPU varied between 50-70%, towards the end of the editing process, thankfully, the only thing that was slow to respond was Shotcut. The rest of the computer could function perfectly normally. Shockingly, Shotcut only crashed unexpectedly twice over the period of editing the video! For comparison, 5 years ago, Adobe After Effects would crash upwards of 10 times a day for me.
A limitation we had to have with the video, was its length. A requirement for the video was for it to be 5 minutes (+/- 30 seconds). Keeping the video within the time constraint meant that a lot of more detailed explanations had to be cut out (and is partially why this entire write up exists).
Conclusion
Would I ever use this system myself? Probably not, however it was a ton of fun to make. But name a more fun password manager, that not only offers the lights, beats, and candy like this system, but also has a fun 5 minute video to accompany it?